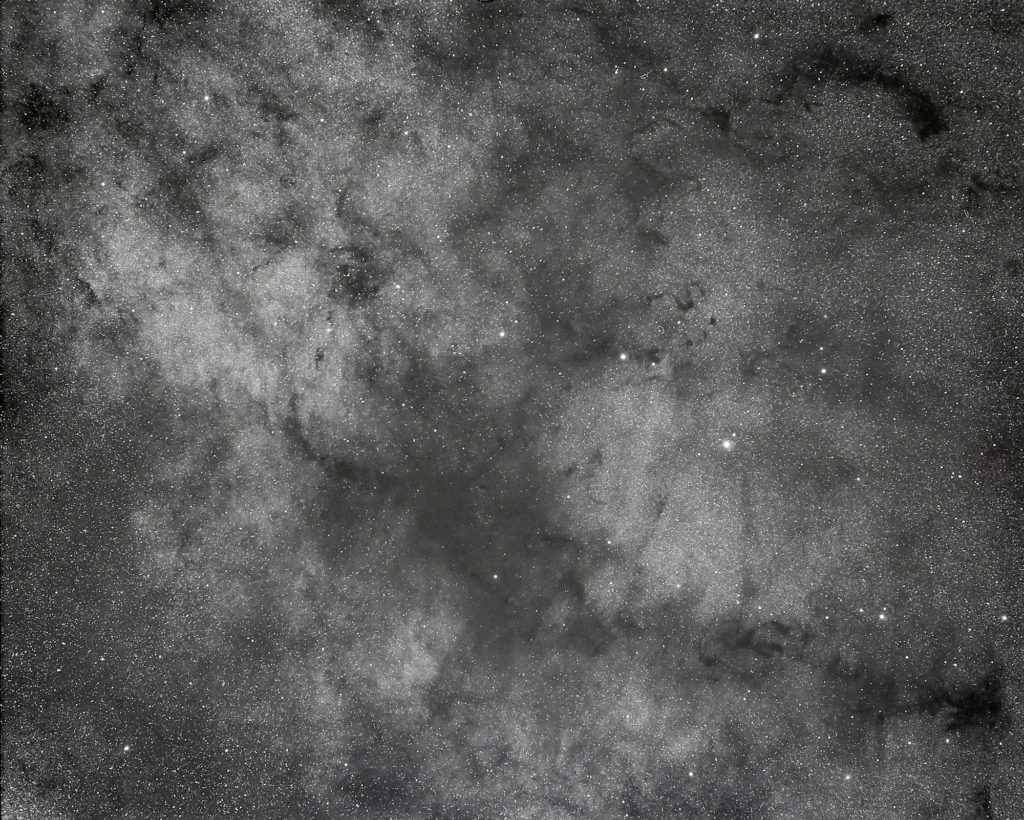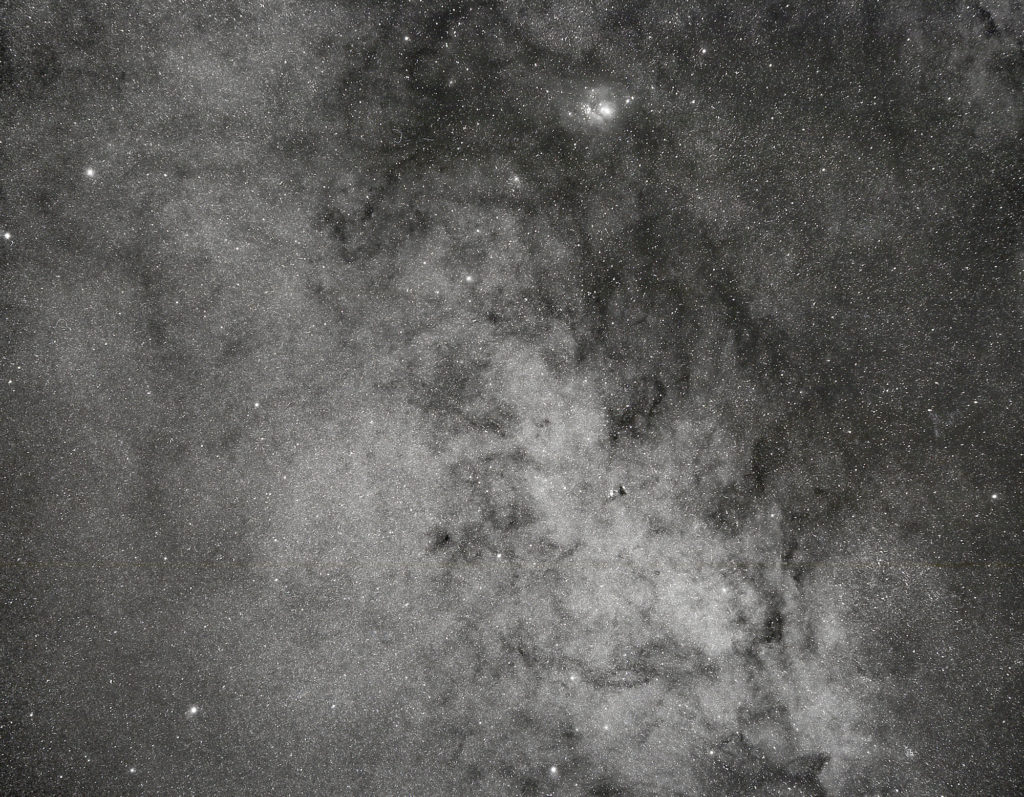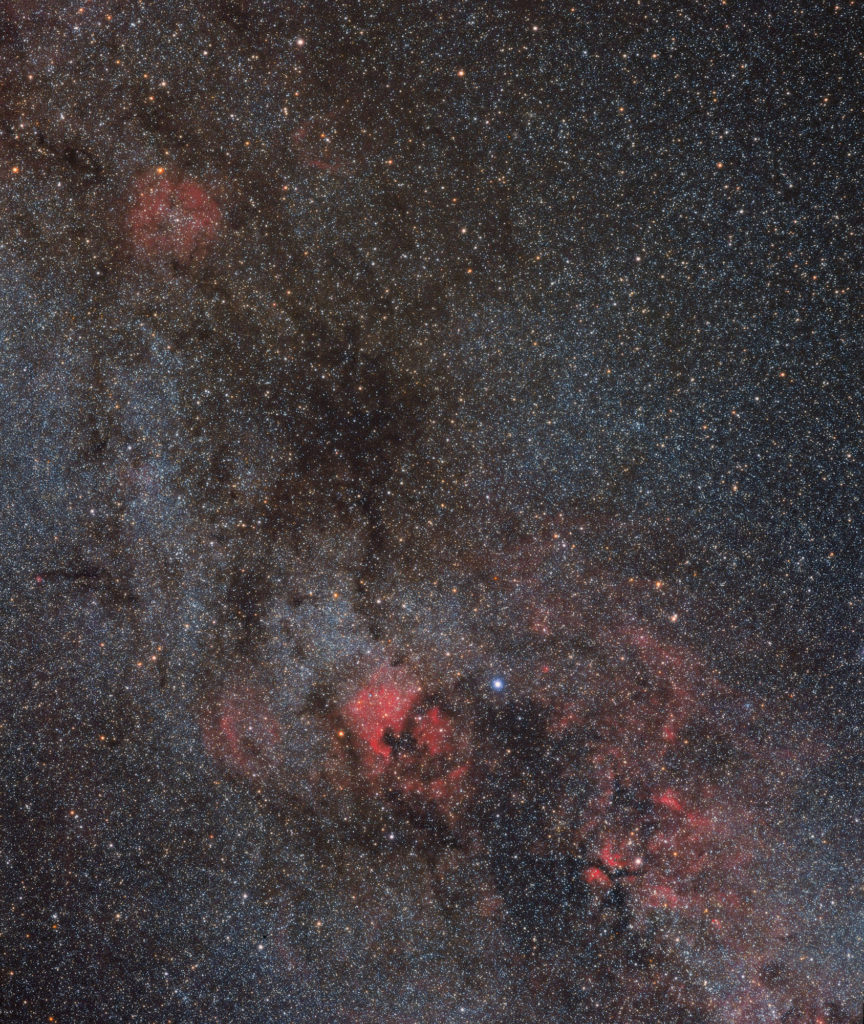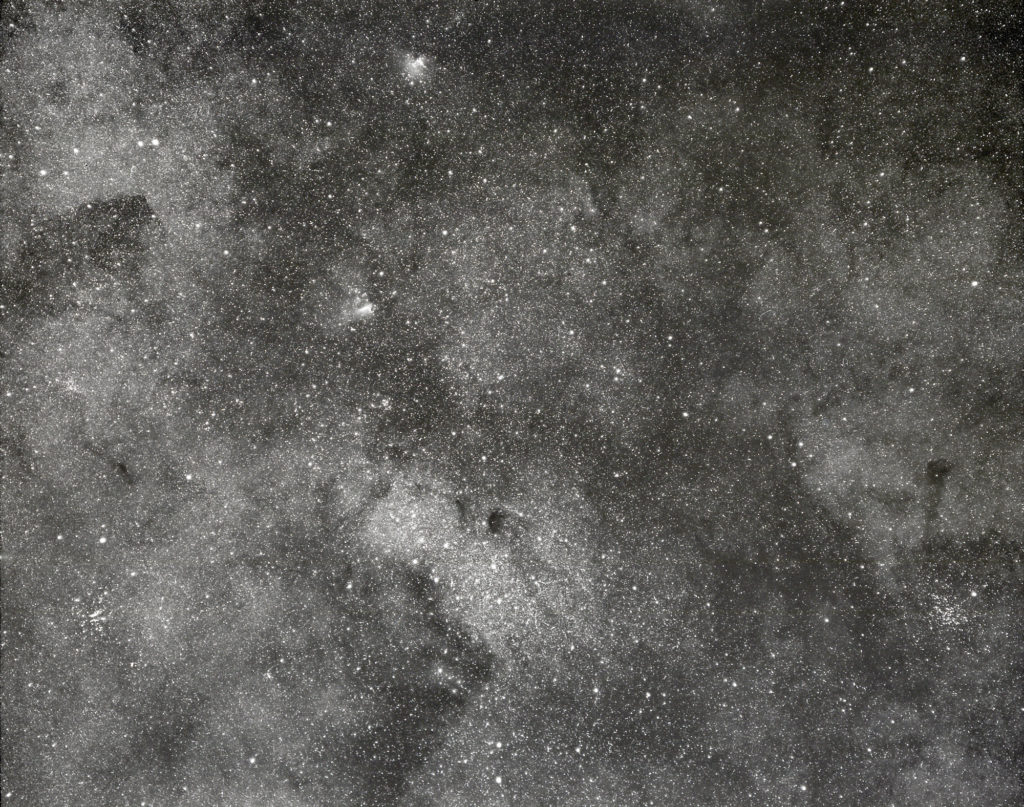
Before the days of sensitive, low-noise digital cameras, amateur and professional astronomers used chemical emulsions on cellulose film or glass plates to record photographic images. But film astrophotography was not for the faint of heart – it took time, patience, and more than a little skill to produce good images of deep-sky objects or the Milky Way. Modern digital cameras now make astrophotography so much easier, of course, so why would anyone use film anymore?
But on a Cloudy Nights forum a few years ago, I came across the film-based astrophotography of James Cormier. Based in rural Maine and blessed with inky-black skies, Cormier produces dazzling analog images of the Milky Way with color film and especially black and white film with a medium format camera piggybacked on his 1980s-vintage fork-mounted Meade Schmidt-Cassegrain telescope. His images are captivating and combine the creamy analog texture of film with an impressive amount of detail of star clouds and dark nebula along the richest part of the Milky Way. They remind me of the classic images of the Milky Way taken by Edward Emerson Barnard in the early 20th century. Barnard’s photographic work, still available in print and still achingly beautiful, spawned decades of research into the composition and structure of the Milky Way.
I contacted Cormier to ask a few questions about how he produces his images, and why, in this age of affordable digital astronomy cameras, he still persists in his film-based work. Of film-based astrophotography he says, “A long exposure film astrophotograph is an astronomical image formed on silver emulsion. The resulting image is nothing less than starlight embedded in cellulose, itself made from star stuff. Imaging this way makes one more akin to a poet or artist. There’s a romantic aspect to the craft.”
Here’s my Q&A with photographer James Cormier.
Brian Ventrudo (BV): How did your interesting in astronomy begin?
James Cormier (JC): My ventures into amateur astronomy began in the late 1970s soon after the Apollo program. I was a bit too young to remember the Moon landings, but many publications allowed me to absorb it as I gained interest. I toured NASA at Cape Canaveral in 1977 at the tender age of nine, and got my first telescope in 1979, a 60mm Tasco equatorial mounted refractor. I explored the Moon and planets, but eventually became enthralled with the deep sky.
By age 15, I was a young, passionate deep-sky observer with much to learn. In ’83 I purchased an 8″ Schmidt Cassegrain and began hunting down Messier objects. I became a disciple of Robert Burnham Jr, through his Celestial Handbook, and Walter Scott Houston through his ‘Deep Sky Wonders’ column in S&T.
BV: Describe your journey into deep-sky astrophotography with film.
JC: Of course, all we had was film in those days. My first piggyback shots of the Milky Way in 1984 were taken with my then new Pentax SLR. These were very humble beginnings, but I stuck with it through the 90s as I was starting my family. In 2001 we moved to darker skies in Downeast Maine. I soon built a roll-off roof observatory to house the 8″ SCT and made very nice images under the darker skies. Deep Sky visual observing was also incredible with the nicer skies, but soon observing would take a back seat to wide-field astrophotography.
BV: You then moved to a medium format camera on a telescope on a motor-driven fork mount?
JC: I adopted the use of the Pentax 6×7 in 2007, continuing to have the camera and prime lens riding piggyback on the 8″ SCT. I continued in the tradition I had learned on, including manual corrected guiding with a reticle eyepiece. At that time I was still raising a family, which meant keeping everything economical. I had pristine skies, and a passion to complete the work, but only enough funds for film and processing.
Working in earnest from 2007 to 2015, exposing hundreds of frames for untold hours on most clear moonless nights, continually refining my exposure and development methods. As funds became available, additional lenses were acquired. These were generally longer lenses to dig deeper into the Milky Way stratum.
Through all of this, having the telescope mounted on a permanent pier in a small roll-off-roof observatory made these efforts possible. Sessions would begin in mere minutes. Likewise for completion and a quick journey to a warm bed!
BV: Can you say a few words about the pros and cons of MF over 35mm? Is 35mm even worthwhile for this kind of work?
JC: Medium format is a professional photographer’s format. It has the advantage of having greater film real estate, which requires less enlargement factor when printed. The 6×7 frame measures a full five times greater than “full frame” 35mm film. Lenses are very sharp, but generally slower. Apertures of f/4 being typically a fast lens in the MF realm. For astrophotography they are usually stopped down to say f/5.6 to form a flat field. The larger film dimensions produce high quality images that are comparable with digital cameras in the ~24mp range, but with a rendering that is distinctly analog.
120 roll film is 10 exposures for 6×7 cameras. This is a blessing! A roll typically will take me a whole week or more to expose during a dark run. From an expense point of view, it will cost roughly the same to purchase a roll and have it developed as a 36 exposure 135 roll.
MF cameras are pretty big and heavy. You’re not going to mount one on an economy or lightweight EQ mount. All exposures will be long and you’ll want a good mount capable of tracking 60 continuous minutes without much fuss.
Common 35mm lenses are faster, allowing shorter exposures. This is great for the beginner who does not want to invest in an hour-long exposure for a single frame. A 35mm frame at let’s say f/2.8 may only require 15 minutes. That’s easier to manage. The 35mm is easier and cheaper to acquire, and rolls will give you more exposure counts, allowing you to mix your astrophotographs with family shots. Lenses and accessories also tend to be cheaper. It’s an easier investment.
I would not recommend medium format until one has mastered 35mm for astrophotography. I did 35mm for almost 25 years prior to going into the larger format. Take your time to learn and gain experience.

BV: Digital astronomy cameras are pretty good these days. Why did you stick with film?
JC: I work with high technology in my day job, so I’m not a Luddite. But working slowly with film allows me to unplug from the complexities of that work. I prefer to keep the work flow as simple as possible. I have chosen to continue with film, mostly because it is what I feel comfortable with, and it’s all paid for! Can you imagine how many times I could have digitally upgraded from the late 90s to present? A mountain of now obsolete equipment and expense! Financially, an impossibility for me.
This is a hobby after all. I’m not competitive with my images. I do just what I want to do. I’ve been chastised by the digital mavens. I’m not interested in getting them to understand. That being said, I’ve also been validated by many when they see the work.
I can name you less than a half-dozen folks using film for tracked long exposure astrophotography the world over, only three of which are doing it at a high level. It’s arcane. I could do what everyone else is doing, and my work would be very similar to what others are getting for results. I’m just not interested in that path. Besides, I just could not deal with the laptop screens, and bleeps through the night. I love the solitude and quiet each exposure provides.
I have modest means but also a passion for what I do. If anything, my tight budget has only enhanced my resolve, by putting myself as the most important tool in this process. I have pristine skies and this is a fortunate circumstance. Without it, I would have probably taken up fishing or some other non-astronomical pursuit.
BV: Despite its technical challenges, what advantages does film have in terms of esthetics of the final image, or work flow, or personal satisfaction?
JC: The biggest advantage is that, given adequate exposure, a film frame produces no noise. Grain perhaps if enlarged greatly. This is one reason why stacking is used in digital work flow. You might stack 30 two-minute exposures (subframes) with digital and combine in a stacking software (with dark frames also acquired) to mitigate noise. I might do a single 60-minute analog exposure and have a similar output. I liken this to the problem of reciprocity failure, an obvious advantage touted by digital photographers until they have to come up with dark frames and multiple subframes to deal with noise. Digital does have the upper hand, but noise is the elephant in the room. Stacking is the secret sauce for all the magnificent work we see in the digital realm. You could stack film frames, and this has been done, but I do not use this method.
Film, because it records slowly does not pick up satellites as readily as digital cameras. Stars tend to reveal their relative brightness and color better on film vs a DSLR. There is no mottle, that crunchy color noise between the stars so prominent in digital subframes. Color fidelity was very high with Kodak and Fuji films produced in the previous era. Seeing a color transparency on a light table and viewing it with a 10X loupe is a real treat, and worth the investment alone in this lonely world of capturing the deep sky on film.
BV: For ‘daytime’ photography, film is undergoing a bit of a renaissance. Do you see such a thing happening for film astrophotography? What should a budding deep-sky film astrophotographer consider?
JC: Gary Seronik and I exchanged correspondence some years ago on film astrophotography. Gary shoots film on a regular basis for daytime photography and dabbles in astrophotography with film on occasion. We discussed publishing a piece in Sky&Telescope on the topic, but such an article would be counterculture in the amateur astronomy world. That being said, I receive solicitations from people interested and they generally ask for advice on things like proper films and exposure. I think many of them don’t count on the difficulties awaiting them. If they have astrophotography experience, they have a fighting chance.
Exposing analog materials is difficult. It is one very long exposure. No stacked subframes. One very long and potentially corruptable exposure. During exposure, one looks out for aircraft and satellites passing through the field and capping the lens when necessary. Attention to the process is constant. Film records very slowly, but surely. Each frame is a commitment, an investment in time.
Typical exposure times on the short end are thirty-minutes, and well over an hour on the long end. My longest exposures have been two hours. I typically use lenses at apertures of f/4 to f/5.6. Anything beyond f/5.6 is typically too slow for film-based work in all but the brightest regions of the Milky Way. Focal lengths usually range from around 100mm to 400mm on medium format cameras. This is the domain of wide-field astrophotography. Consistent work flow is of the utmost importance.
Still, in a world full of distractions, it is a welcome form of meditation, but just a little bit of insanity is also required!
BV: How important is dark sky for your wide-field film work?
JC: It is unquestionably the most important factor. Image acquisition on film requires high signal to noise environment. Light pollution, especially gradients can be difficult to dealt with in post processing, and overall contrast suffers. This results in garish looking color images. You want light from the objects themselves to build onto the emulsion. The great thing here is that, given the ideal conditions, exposures can be very long and lots of information is recorded on the film. There are no dark frames, or bias frames, just one very long exposure. No need to worry about noise. A grainy looking film image is one that was exposed too short. We are building density on the negative (or transparency film) and the quality of the night sky in terms of transparency and darkness shine through allowing a highly detailed and totally excellent image.
BV: Which film stocks work best for deep-sky astrophotography?
JC: All films behave differently in long exposures. Some are useless beyond a few seconds exposure because of reciprocity failure. Others are acceptable, but few are excellent. Currently, there are a few good performers. My standard for B&W is Fuji Acros II. An excellent film stock! This is followed by Kodak Tmax 400, which does very well. For color transparencies, Fuji Provia 100F is acceptable in exposures less than one hour and apertures of f/4 or faster. Color films can be problematic. The primary color layers have different reciprocity responses, thereby introducing color shifts in long exposures. Color negative films like Kodak Portra and Ektar can be used and record well, but have wild shifts in color performance.
Long gone are the days of Provia 400F, Kodak Ektachrome 100S and E200. They were excellent for color work and recorded the all-important Hydrogen-Alpha spectrum very well. My freezer still contains these great emulsions.

BV: How do you determine the correct exposure?
JC: Because of a variety of variables, experience is the proper tool. Metering is never used. As such, exposure is not something you are going to determine in a one-off occasion as some would hope. Through experience, exposures under similar conditions are conducted and good notes are taken. Through repeated trials we find the ideal exposure based partially on taste, and also on technique. We are trying to record as long as possible but within the limits of natural sky glow. Once you reach this fogging level, your done. My frames generally show a hint of this even fogging in 60-minute exposures near the celestial equator, and at about 90 minutes near the zenith at an f/4.8 aperture.
BV: How about developing?
JC: Once a roll is completed, the decisions of processing take place. Chrome films are generally push processed. Negative films processed normally. Pushing chrome film is no replacement for exposure. Pushing is a method to enhance faint details and decrease Dmax at the expense of apparent grain, contrast, and color fidelity. A mild push of one stop is often desired. This is where the astrophotographer must understand the conditions of exposure, the film used, and the desired outcome. This outcome is determined by experience and good note taking, and constantly refining the process as you continue your efforts.
BV: How do your approach digitization of your negatives or color transparencies?
JC: Modern film astrophotography takes advantage of a hybrid work flow. Frames are scanned and processed digitally in programs like Lightroom. Cautious editing is paramount as to not overcook the images, which will look terrible. Curves and levels, and perhaps some contrast manipulations will benefit the frames. Dust removal by use of clone tool or healing brush are another advantage of the hybrid work flow. Black points are also set in post processing, negating apparent natural sky glow in the finished image.
Of course, simply looking at a fresh chrome on the light table is perhaps a most simple way to enjoy the finished frames. Surfing the frames with a 10X loupe is very gratifying.
For color work, transparency films have incredible fidelity. Negative films are a bit sharper, can be exposed longer, and generally have good color recording ability. My love is for the B&W negative. The B&W image can record very deep and with excellent contrast and tonality. Perhaps it was my love for the work of Edward Emerson Barnard, and the classic images of my youth that influence my preference for B&W.

BV: Is it possible to produce a good image with a black and white negative onto traditional photo paper with an enlarger in a darkroom?
JC: Yes, if you have a good “thick” negative. Basic sensitometry implicates density with exposure and how the negative is developed. Many of my negatives are on the thin side and they scan quite beautifully, but for traditional work flow at the enlarger the ideal will require a negative with good density, like any good B&W negative needs to be in a traditional work flow.
BV: What are your near-term plans for your astrophotography work?
JC: I’ve not done consistent work since late 2015, due to changes in my life. I just received a new equatorial mount (a Losmandy G11) to drive multiple Pentax 67’s with larger lenses. I’ve also acquired a trove of equipment from Canadian astrophotographer Igor Morin, who is encouraging my return to working the sky with the camera. A new observatory will replace the old existing shelter. I’m currently cutting some overgrown areas on my south horizon. I’d like to get down to -30° declination so I may capture those southern gems in Scorpius and Sagittarius. It’s been a while.
BV: Given the labor-intensive nature of your photography, you obviously spend a lot of time under dark and clear sky. What insights have you gain as a result of your work?
JC: Astrophotography, combined with deep sky observing has made me keenly acquainted with the structures of the Milky Way, especially the meanderings of the Great Rift. The visual sky is much more nuanced as astrophotography can conflate subtle variations of brightness and star colors. Both methods of observing have their advantages. Building an image on film through long exposures allows observing of a different kind. To bring forth to the eye what cannot be typically seen.
Visually, I’ve almost exclusively moved to binocular observing. I acquired a binocular telescope, the 100mm Orion BT-100, and the deep visual views provided by this instrument reveal a layered tapestry of our galaxy incomparable to any cyclops view. The wide-field binocular views in conjunction with wide-field astrophotography allows me to admire the larger scale structures and immense beauty of our galaxy. The young boy looks back at the journey and I feel privileged. It’s a wonderful way to live.
Share This: